![IMG_3446[702] (Custom)](https://reflocate.com/wp-content/uploads/2017/09/img_3446702-custom.png?w=700)
Hurricane Irma. I am the blue dot on this radar. Photo: Kelly Dean
14 Basic Hurricane Survival Tips for Before, During and After – From a Hurricane Irma (et al.) Veteran
By Kelly Dean
I have been through several hurricanes now, as well as ice storms and tornadoes up north. These can all produce days without power. The following tips I organized while preparing myself for Hurricane Irma, based upon my personal experiences with all these natural disasters, as well as tips I’ve picked up from experienced neighbors. I am sharing them here, but use them as you see fit. I assume no responsibility.
You should always mind mandatory hurricane evacuations, especially on islands and around coastal areas near a storm. These areas are going to get hit the worst, regardless. Nonetheless, you are the only one who can make the decision to leave. Here are some thoughts on leaving. And here is what it’s like if you stay.
That being said, it is not always easy to evacuate Florida. It is a narrow peninsula surrounded on three sides by water. The skittish and less-invested tend to be quick to leave Florida during bad times, filling up flights and roadways. Fuel becomes scarce.
Storms are generally traveling in “some sort of northerly direction” as well. This leaves fewer flight or flight options for Floridians to get away because north is the only way to go by car, and you might simply get caught in the storm’s path down the road. Local shelters fill quickly, especially with threatened coastal-area residents, parents with small children, and the sick and elderly.
That often leaves only fight as an option.
If you’re preparing for a hurricane, you don’t have much time to waste. It’s a week of preparation and 24-36 hours of nasty lock-in weather. So let’s get to it. Up until the storm itself, always keep your evacuation options open so long as they are actionable.
If you live in a Florida building code compliant concrete block structure (CBS), this is always better in a serious storm. They are built for code and can withstand most hurricane force winds.
Know your evacuation zone letter and color in advance so you’ll know if it’s announced on local TV news, radio, or weather alert. If local authorities say to evacuate, it is best to do so. It’s absolutely necessary if you are coastal or on a barrier island due to storm surge.
![IMG_3433[714] (Custom)](https://reflocate.com/wp-content/uploads/2017/09/img_3433714-custom.jpg?w=700)
Line for plywood for hurricane shutters. Photo: Kelly Dean
These items become scarce fast. It is said that one should have 1 gallon of water per person, per day. This works out about right for drinking. But if you have one or two bathtubs full of water and you have a few jugs of cleaning water handy, it’s far better to be able to wash too.
So fill anything you have with clean tap water — buckets, trash cans, why not?
I like to keep wash-quality water and drinking-quality water as separate items, planning-wise. Wash water can be adapted to drinking water by boiling in a pinch, while the drinking water can be solely drinking water.
So, for each person — during the days without power:

Bottled water, 35-count, half-liter (16-oz). Photo: Kelly Dean
Water:
Buy at least one 35-count case of 16-oz drinking water per person to cover four days, minimum (approx. 1 gallon per day). This allows for one 8-oz cup of drinking water per waking-hour, each day, for four days. Remember, it’s hot and humid and hydration is necessary. Leftover drinking water can always be used for other water needs as time goes by. This will not be your only potable water; more on this below.
Food:
An 18-pack of extra-large eggs, which I can scramble with the latter-mentioned cheese and maybe some cold cut ham pieces, provides breakfasts for one person for six days. Eggs are protein, very filling and satisfying. They are also fairly spoil-hardy in a cooler. I serve grilled and buttered toast for breakfast as well. I make homemade fresh coffee made from boiled water using coffee and a plastic mesh coffee filter.
For lunches and some dinners, I like quick, hearty sub sandwiches in the first few days. Pre-sealed grocery store sub sandwiches, which are made for shelf life, are quite good for this purpose. You can buy them at grocery and convenience stores in the refrigerated deli section. Keep them cool. They can be packed quickly if you need to bug out to a shelter too. Buy an arm-load of these, two per day for four days.
Add three bags of chips, two of loaves of bread and two additional pounds of deli cold cuts and 1 pound of cheese that seal and keep well in a cooler. Mustard and mayo does fine when semi-cool.
For veggies, I buy large bags of raw baby carrots and cut up celery sticks, which are packed in Ziploc bags and provide good fiber.
Remember, this is per person.
Take advantage of the fact you have coolers and ice for the first four days — eat the perishables first.
I buy about three 10 pound bags of ice for my freezer until the power goes out. These are added to the homemade frozen Ziploc ice bags and gallon jugs I will reference later. Cubed ice has more cooling surface area and is best for drinks but has a shorter life. It’s best to have both cubed and block (bags and frozen jugs).
Once my perishable foods are eaten, and my ice depleted, I switch to canned and dry goods such as soups, tuna and pasta if the power-loss lingers into a week. These items are non-perishable. They can be heated over gas or eaten cold from the can.
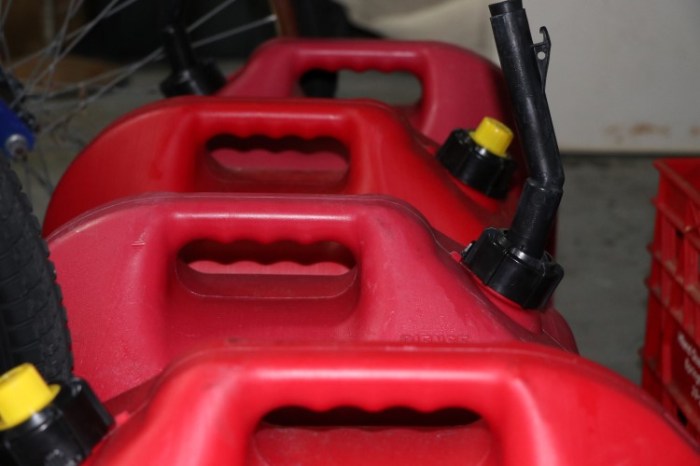
Plastic gas cans. Photo: Kelly Dean
Gas:
Fill your gas tank in one vehicle in case of evacuation. If you have a generator, fill at least 20 more gallons in plastic cans that can be used for the generator, chain saws or humanitarian assistance – you might want to simply give some gas to those who might need it more.
![IMG_3435[710] (Custom)](https://reflocate.com/wp-content/uploads/2017/09/img_3435710-custom.jpg?w=700)
Plywood hurricane shutters installed. Photo: Kelly Dean
This is the important second step. But plywood is almost impossible to get less than a week out from an approaching storm.
I prefer plywood shutters to metal, but shutters are very important and should be installed at least a day before the wind gets unruly.

Metal accordion shutter panel. Photo: Kelly Dean
Plywood is much quieter when a real storm blows in. Plywood makes a thudding sound when rain, wind or debris hits it. Metal makes a clacking sound. This can go on for hours and it’s quite unnerving, especially if you wear hearing aids.
In my area, homes built after 2004 must be pre-drilled and fitted for shutters; however, they are often “missing.” Use the existing screw holes to mount the plywood or be ready to drill into concrete and install anchors for the screws, adding a half-day to the job. It is likely you already have pre-drilled holes with screws. Measure from center of screw to center of screw for hole placement, using a good-sized bit for wiggle room. Use stainless screws (and washers, if needed). Check in advance what existing you have and operate accordingly.
Ideally, plywood is cut to fit inside the window frame and secured against the actual window with storm clips, which grip the window frame nicely (but they also scratch the paint, touch-up required).

Inside view, top 4×8′ plywood panel storm shutter. Photo: Kelly Dean
However, as long as you try to avoid cracks, they can also be secured flatly to the outside of the frame with screws and washers, if needed. This works fine. Eight to nine 4×8’ sheets will cover most three bedroom homes without cutting – based upon standard 35” windows, 70″ double-windows and 70″ double-doors. The exterior frame is slightly bigger, of course. But an 8’x4′ sheet is 96″x48″, so you should be covered. Hang the plywood vertically or horizontally as required, with only a little overhang and little or no sawing.
In a shortage, fencing panels can be used for windows. Even lattice, decking or slats can be used in a shortage as well. You’re largely trying to stop projectiles coming through the windows. Wind and rain are important, yet are secondary concerns, especially if you already have good storm windows per Florida building codes.
Most people recommend 5/8” plywood for shutters. I use 15/32” because it’s lighter and easier to handle, assuming it’s snug against quality storm window frames. It’s always better to have the light-weight wood up, firm and ready-to-go than the heavy-weight wood not up and not ready-to-go. Use screws, never use nails (even on a stick home), and fasten them snugly to the window frame with as little air gap as possible.
Plywood is a two person job, however, especially if you’re retaining the 4×8’ size to eliminate cutting time. Metal accordion panels are just over 1 foot wide and up to 82” long and can be installed by one person on a ladder, albeit more slowly. 1 foot wide metal panels can cost $40 each and only cover 1 foot. That can buy two 4×8’ plywood sheets and cover and entire double window or sliding glass door. Unless you have the metal type in advance, it will be no easier to obtain than plywood, and likely far more difficult.
![IMG_3439[712] (Custom)](https://reflocate.com/wp-content/uploads/2017/09/img_3439712-custom.jpg?w=700)
Photo: Kelly Dean
If you are solo and have metal shutters, plan on it taking a half-day, so long as they are pre-drilled.
(Editor’s note: Let plywood dry before removing and storage to help retain shape. They will bow, wrinkle and separate when wet. Store it in a dry garage, attic or shed.
Once you remove the stainless steel screws, also known as hurricane anchors/bolts, it is best to screw them back into the holes as soon as possible — after blowing out the concrete dust and spraying some lubricant into them. The dust in the anchor is a screw-stopper and bugs, like spiders and dirt daubers, will move into the holes quickly following a storm.)
![IMG_3451[704] (Custom)](https://reflocate.com/wp-content/uploads/2017/09/img_3451704-custom.jpg?w=700)
Hurricane Irma damage. Photo: Kelly Dean
Anything that can blow could end up through yours or your neighbor’s windows or screens — consider that. A breached window creates a vacuum threat to the home as well.

Graphic: WPclipart.com
The refrigerator and freezer as coolers
Don’t be too quick to abandon your refrigerator and freezer when the power goes out for a few days. The refrigerator will keep food cool enough for two days if not continually opened and closed (hear that children, adults only).
Spread towels in front of the refrigerator freezer to catch defrosting water early on and change daily.
The freezer will stay freezer-quality for two days – then it becomes a cooler for a third, maybe a fourth day, especially if you have frozen ice blocks in there as recommended. Condiments and sealed drinks stay in the refrigerator/freezer as they last longer than meats, produce and dairy, which require lower temps and better cooling.
So as a timeline, at the end of the second day without power, start addressing the fridge viability issue and transfer to coolers or the freezer (which is acting as a cooler at this point). Focus on meats, dairy, eggs and produce.
At the end of the third day address the freezer viability issue. Then use what ice you have frozen to transition to iced coolers as needed. Remember, you want to keep refrigerated items as close to 40 degrees Fahrenheit as possible; 45-50 degrees, however, is more likely at this point. Be satisfied with cool, but not with room temperature. Freezer items, once thawed, become refrigerated items, obviously, so evaluate accordingly.
I have personally gotten four days use out of the refrigerator/freezer combo in an 85-90 degree house, along with a little supplemental use from a cooler for sandwich meat, dairy and eggs.
I do not generally refrigerate much drinking water as not to waste cooler space, unless it’s pre-frozen ice that melts into drinking water.
All in all, this should give you about four plus days of cooling before the ice runs out entirely.

Photo: Kelly Dean
Freeze Gallon Jugs and Ziploc bags
Freeze plastic gallon jugs full of water. Freeze Ziploc bags full of water, both quarts and gallons, and squeeze into every available freezer space you have. Try to have one block on each shelf and in the door. They are cheap; they transfer easily to coolers and later serve as fresh water when melted. These can make a huge difference when shuffling food around in limited space. There’s more on gallon jugs below.
The garage door and your car(s)
During the hurricane, your garage door will literally breathe, bowing in and out, but far more inward. To help this, there are two automobile placements during a severe storm. Both have validity during a hurricane, depending upon your real-world situation.
Method #1
One is to place your vehicle outside, lengthwise across your garage door to help block wind gusts against the exterior garage door. It is also another six-inch water advantage for your car in a flood situation. This method is the most common I’ve seen, as many use their garage for storage, not cars. They simply don’t have the room to fit the cars inside.
Storms both suck and blow, but mostly they blow from outside against your home’s walls and exterior surfaces. Therefore, it is likely your garage door won’t open during a storm as it’s wind-wedged against the tracks. If opened, it could stick during the high winds or blow inward. This is very dangerous.
Therefore, don’t even try to operate your garage door during a hurricane. It could give way and seriously injure you. You might as well lock it closed and kill its breaker for safety.
Method #2
If your vehicle can fit inside the garage, back your bumper against the garage door on the inside to keep the door from moving inward quite so much. Use a duct-taped towel to mitigate any scratches to your car’s bumper.
Duct-taped pool noodles across the top of a closed garage door will help seal the top from blown rain as well. They’re cheap. Remember: never open the door in a storm.
![IMG_3447[703] (Custom)](https://reflocate.com/wp-content/uploads/2017/09/img_3447703-custom.jpg?w=700)
Hurricane Irma flooding. Photo: Kelly Dean
In a hurricane, you are always better inside. This is a good thing, because your storm shutters actually seal you inside.
Yet storm surge, breached dikes, broken levies, fire and roof loss can possibly make a quick evacuation preferable to staying inside. Plan for it in the back of your mind and hope it never happens. When shuttering, you should plan for two escape routes out of your home in a flood or fire; each should be on roughly opposite sides of your dwelling. This is because a hurricane blows from one direction when the eye is coming at you — and the other direction after it has passed.
If hurricane force winds are blowing against a door, you will not be able to open it easily, if at all. It is therefore best to have another option as well. It would be hard to fathom leaving shelter in a hurricane, but it might be the only solution in a fire or flood.

Emergency tether for storm. Photo: Kelly Dean
Tie a rope near each door and hang it there in case you need it. I attach a 30-foot dog leash cable to one escape route, having the option of clipping the other to my belt, if necessary.
A huge garage door and a no-exit attic are very poor escape routes, for obvious reasons. Nevertheless, put a sharp axe or hatchet in your attic in advance, in case you need to cut through the planking and shingles in a deep storm surge. The garage door is not an option.
Based upon my elevation, I planned worst-case for 3 feet of water in my home and garage, then raised important valuables accordingly. This process is time-consuming but also rest-assuring.
For the record, it would require dangerous rising flood water levels or a fire for me to ever consider abandoning my CBS house in a hurricane, even if the roof is gone. But that’s just me.

Life preservers and ladder. Photo: Kelly Dean
Have life preservers inside the house
I have Coast Guard approved life preservers inside the house for flash flooding and extreme storm surge. I have as many life preservers in the house as there are people in the house. I even have an auto-inflate version I sleep with if necessary – and a spare. Coast Guard approved life vests are cheap and give you time to think in a crisis.
I have ladders inside the house and one in the garage, in case I need time to think.
During a hurricane, storm surge and flash flooding happen fast and water is most likely to take your life.
Nonetheless, all these efforts are largely for peace of mind — until they aren’t.
The toilet
Fill all bathtubs with water before the storm for flushing, sponge bathing, hair washing and emergency water when boiled. Bathtubs hold 40 gallons of water up to the overflow drain.
It takes about ¾ to 1 gallon to flush a toilet when poured from a bucket directly at the hole; be sure to hold down the handle when doing so. Keep a bucket with a lid in the garage, marked “privy,” in case the sewer or septic is backing up.
Boil bathtub water before using for dishwashing, cooking or drinking.
Save one-gallon water jugs for wash water use too
Before the storm, fill four one-gallon-sized water jugs you have saved with water. Use any additional jugs for freezing into ice and later drinking water use if space permits. Don’t pour out water. Instead, transition it into a different use: former ice becomes cleaning water or drinking water, and so on, depending upon its original source. I would pour melted ice water into jugs for washing and wring out freezer defrosting water towels for household plants, for instance.
Heat from cooking and lighting with gas
It will be about 85-90 degrees Fahrenheit inside your Florida dwelling after the first eight hours without power. Humidity will be high as well. That’s very warm. Cooking with gas inside will raise room temperatures. Cooking outside will help mitigate this.

Cooking with gas. Photo: Kelly Dean
Use gas to cook and for lighting if necessary
It goes without saying, but it must be said: cooking with gas flame can cause fire; be cautious.
After a storm, gas is best for emergency cooking because it’s readily available when electricity is not. It’s available in small and refillable large barbecue tanks or camping “bottles,” which can be stored before a storm. Be sure to take caution if you’re new to gas. Propane stoves and lanterns can be purchased at any camping goods store and should be the centerpiece of your power outage cooking needs. I have used butane stoves as well and they are my personal favorite but fuel is less available.
Certainly, people cook with propane and natural gas in the house all over America, but they are experienced with it and their houses aren’t air and water sealed against a pending hurricane. Take precautions and be smart.
A propane lantern outdoors will attract bugs unless you’re screened-in.
I never use candles – never, ever.

Sandbags against garage door. Photo: Kelly Dean
Sandbags
Sandbags are great and underreported for their effectiveness. I’ve known many who’ve avoided major water damage using sandbags, including myself. A storm surge comes quickly and leaves sooner than you think. Sandbags can make the difference.
Half-filled bags are easier to lift and the extra interior bag space makes them formable to fit into nooks and crannies.
Line sandbags across the bottom of the garage door. It takes about 17 to 20 half-filled commercial sandbags to get across a typical two-car garage door. If you only have 10, go ahead and use them: focusing on blowing water areas not protected by the car’s tires and body (if using the outdoor parking method). This helps keep blown water out and braces the garage door against wind as well.
Use sandbags wherever needed; paying special attention to the aforementioned garage door, sliding doors, front and side doors and swimming pool areas.
Ten half-filled bags are usually enough for a sliding glass door. Five are generally enough for standard-sized doors. Bags can be purchased empty at most home improvement and some hardware stores.
As Florida is mostly sand, you need not go to the beach to fill them, just use your backyard; you can always put it back.
Purifying with bleach and boiling
Six to eight drops of unscented bleach per gallon of water will purify clear-looking water against most all pathogens, making it drinkable. Also, raising water to a boil will make it drinkable. Pouring it from container to container will re-oxygenate it and make it taste less flat. A plastic coffee filter and a pasta strainer are very useful items to have on hand for many filtering uses.
Bleach is very important for when you are unclear about whether something is sanitized or not, so have, at least, a gallon on hand, remembering to rinse well with water.
Random thoughts:
Close all your interior doors and exterior windows in the house during a hurricane. Open and close doors as you travel through your home during a storm; this is especially true when venturing into the garage. Studies have shown that this encapsulates the residence somewhat into smaller units in case of a vacuum breach in any individual area, limiting a chain-reaction. A vacuum breach can focus pressure against weak areas, including the roof.
Put important insurance papers, documents, and pictures in a Ziploc bag and put them somewhere safe, high-up and easy to get to later.
Pack a small bag or backpack in case you need to go to a shelter; expect to be there 48 hours and have pre-made sandwiches and water already, as such will be in short supply.
Make a video of your belongings and save it to a thumb drive — a good idea for insurance reasons.
Backup your computer and phone.
Make sure you have a clock radio and NOAA radio that all run on batteries for when the lights go out.
Charge your cellphone in your car at night when it’s cooler, not in the daytime.
![IMG_3438[713] (Custom)](https://reflocate.com/wp-content/uploads/2017/09/img_3438713-custom.jpg?w=700)
Hurricane boat preparation. Photo: Kelly Dean
If you have a boat that’s covered, turn off the bilge pump and add water to the bilge for weight. If it’s uncovered, expect as little as 8 inches of rainwater and decide whether to allow the bilge water accumulation or not.
If it’s on a trailer, tie it down to the trailer. Park the boat with the motor facing the direction most likely to have the strongest winds. Wind gets under a bow and can raise it and move it around. Chock the trailer tires. The southwest corner of the house provides maximum wind-break for a parked boat at the leading edge of most north-bound Florida storms, but the opposite applies on the tailing edge.
If your boat is on a lift, raise it high and tie it down to the lift slats. Tie-off a dock line to a pole or piling in case of flooding or wind drift.

Graphic: openclipart.org
Tornadoes:
Tornadoes often live in hurricanes, even in the early and latter outer bands.
Hurricanes push things over and send them sailing due to high straight-line winds. Tornadoes, on the other hand, can lift things off the ground and drop them miles away due to their upward draft. Secure your property with a mind to both.
Utilities:
Utility companies work long, hard hours after a storm, especially linemen. Homeowner frustration kicks in at about the third day due to the heat. Nonetheless, if you see an open breaker (surge protection) on a pole in your neighborhood, it could be something bigger down-line — or it could just be the breaker itself due to a lightning strike nearby. Don’t be afraid to stop a lineman in your neighborhood and ask them to check. It could be a quick-fix saving you days of power-outage.

Open circuit breaker means no power due to a local issue. Note the bar. Could be simple or down-line. Photo: Kelly Dean

A closed breaker means power is possible locally, so long as there’s no down-line issue. Photo: Kelly Dean
Generator options:
If you have a generator, many refrigeration issues become moot. Most small, common home improvement store job-site generators (3000-5500 watt) can run a refrigerator/freezer, some lamps, a TV, some fans, and maybe a few other small items –but not central air conditioning, an electric water heater, or an electric well pump. These big items double the required power when they kick on. Therefore, appliance choices must be made based upon the continuous wattage total added to the biggest turn-on spike potential. Therefore, small generators can’t handle much more than the typical refrigerator/freezer in this case.
Most small generator users cycle their generator use on and off to get the best balance between results and fuel use.
A larger, medium-sized generator (8000 watts continuous) can accommodate a small window air conditioner unit easily (5000-8000 BTU) or can cool a larger bedroom and even a living room unit (15,000 BTU). Plus, they can handle one or more of these more taxing items as well. If the generator has “turn-on” head-room (up to 13,500 watts or so), it has more options.

Portable gas generator. Photo: Kelly Dean
Cycling on and off as needed is still a good idea to maximize fuel use. I own a generator with 8000 continuous watts and 13,500 watts peak headroom for turn-on items. It is standby wire-able into the breaker box, but I do not wire it that way for flexibility. This unit will run a good-sized air conditioner, a well pump and even a water heater, if used as needed, then disconnected.
Plan for eight to 10 hours of generator use on a tank of regular gas, give or take. By the way, regular gas generators can also be loud and annoying to family and neighbors. And gas will be scarce after a hurricane.
Larger Generac-level standby generators (8000-22,000+ watts) can run an entire house, switch over automatically and cost $2,000-$5,000, but they must be situated in advance and wired into the breaker box; they depend upon a propane tank or natural gas availability.
If you don’t horde emergency supplies in advance, you should shop using an emergency hurricane supply list a few days before the storm. There are many available online. Google “hurricane shopping list” and pick the one you like the best. When the supplies are sold out, it’s too late.
I do not generally kill my main electrical breaker entirely. I like to have more control. I will unplug trivial surge-prone items and shut down other items as needed, often after the power has gone out to avoid the tentative on-off startups that happen.
You should keep a set of tools handy inside the house. I have a claw hammer, Phillips and standard screwdrivers, channel locks, vice grips, wire cutters and gloves. My pre-charged cordless drill-screwdriver is usually around too with a set of bits. After Irma, My front door wouldn’t open for two reasons: 1) water had blown into the lock and it froze in the locked position. I had to take it apart; 2) the door became wet, wind beaten, swollen and wedged itself closed in the frame. So it’s nice to have tools.
Insects:
Insects tend to swarm after a storm as they seek to reestablish their homes. You will see unwelcomed bees, wasps, hornets, dragonflies, ants, and other insects in abundance just after a hurricane in places they don’t generally inhabit so plan accordingly. Fortunately, you will also see welcomed birds and animals you seldom see as well.
Condensation:
Your restarted air conditioner will we tackling high indoor humidity after a storm and power outage. Take care to watch for A/C condensation water runoff, which can catch you by surprise and ruin stored items — just after you took such care to avaiod flood water.
Remember, you will get through this and you will be stronger on the other side.
*Editor’s note: The author wishes to thank Michael Hollow, candidate for Cape Coral Mayor and Josef Zimmerman, owner of Sasse’s Italian restaurant for their home and food preparation help. He’d also like to thank Gayla Wampler for her camping technique contributions, and Jamie Dean, Master Electrician, IBEW, for his spirited contribution to this article as well.


